리액트 외부영역 클릭 감지 드롭다운 구현하기- 이벤트 버블링과 stopPropagation.
드롭다운 구현 중 외부 영역 클릭감지를 어떻게 해야하나 구글링을 하며 알게된 내용을 코드와 함께 상세히 적어보겠습니다.
구현을 위해 필요한 지식은 useRef와 이벤트 핸들링, 그리고 버블링입니다.
이 내용들을 다 알고 있다면 바로 드롭박스 구현쪽으로 넘어가시면 됩니다~
[사전지식]
1. useRef란?
리액트에서 특정 DOM을 선택하는 용도로 사용하거나, 렌더링과 상관없이 특정 값을 유지하고 싶을 때 사용하는 Hook이다.
다음 간단한 예제 코드이다.
import React, { useRef, useEffect } from 'react';

function App() {
  const myInput = useRef();   //useRef 선언

  useEffect(() => {
    myInput.current.focus(); // 페이지가 로드될 때 input에 focus를 주는 코드
  }, \[\]);

  return (
    <div className="App">
      <input ref={myInput} />  {/* ref참조를 원하는 DOM에 ref를 적어줍니다. */}
    </div>
  );
}

export default App;
2. 이벤트의 흐름 ( 이벤트 캡처링, 타깃, 버블링)

이벤트 흐름은 캡처링 단계, 타깃 단계, 버블링 단계로 나뉜다.
이벤트 버블링은 자식요소에서 발생한 이벤트가 부모 요소로 전달되는 현상을 말한다. 이는 그림처럼 이벤트를 듣고있다면 조상 요소인 window까지 버블링이 일어난다.
이렇게 타고타고 올라가는 버블링을 막아주는 녀석이 stopPropagation() 함수이다.
function Button({ onClick, children }) {
  return (
    <button onClick={e => {
      e.stopPropagation();
      onClick();
    }}>
      {children}
    </button>
  );
}

export default function Toolbar() {
  return (
    <div className="Toolbar" onClick={() => {
      alert('You clicked on the toolbar!');
    }}>
      <Button onClick={() => alert('Playing!')}>
        Play Movie
      </Button>
      <Button onClick={() => alert('Uploading!')}>
        Upload Image
      </Button>
    </div>
  );
}
Play Movie 버튼을 눌렀을 때 stopPropagation() 처리를 해주지 않았다면 ToolBar의 alert까지 띄워지지만
_Button function에서 stopProppagation()을 처리해주기 때문에 버블링이 일어나지 않고 해당 이벤트 선에서 끝난다.
stopImmediatePropagation()은 이벤트 전파 뿐만아니라 형제 이벤트 또한 실행을 중지한다. 어떤 조건이든 즉시 이벤트를 멈추는 것
이벤트 캡처링은 이벤트가 발생된 곳에서 자식요소로 이벤트가 쭉쭉 전달되는 개념으로 버블링의 반대이다.
브라우저의 이벤트 전파 방식은 버블링이 기본 값으로 이를 사용하기 위해 별도의 옵션을 주어야 한다.
이벤트 리스너 등록은 다음과 같고, 세번째 인자로 캡처링 사용을 옵션으로 줄 수 있다.
EventTarget.addEventListener(지켜볼 이벤트, 이벤트 발생시 호출할 함수, 캡처링 사용여부 boolean)
document.addEventListener('click', (e)=>{...}, true);
document.addEventListener('click', (e)=>{...}, {capture: true});
만약 버튼 a,b,c 3개가 중첩되어 있다면, 가장 안의 요소인 c를 클릭했을 때
버블링: c -> b -> a 순으로 이벤트리스너가 호출되고
캡처링: a -> b -> c 순으로 이벤트리스너가 호출된다.
3. event.target 과 event.currentTarget
간단히 말하면
event.target은 이벤트가 처음 발생한 DOM요소로 이벤트를 발생시킨 요소이다.
event.currentTarget은 실제 이벤트 핸들러가 동작 중인 요소로, 버블링을 한다고 치면 이벤트 전파로 현재 보고있는 이벤트를 보여준다.
[드롭박스 구현하기]
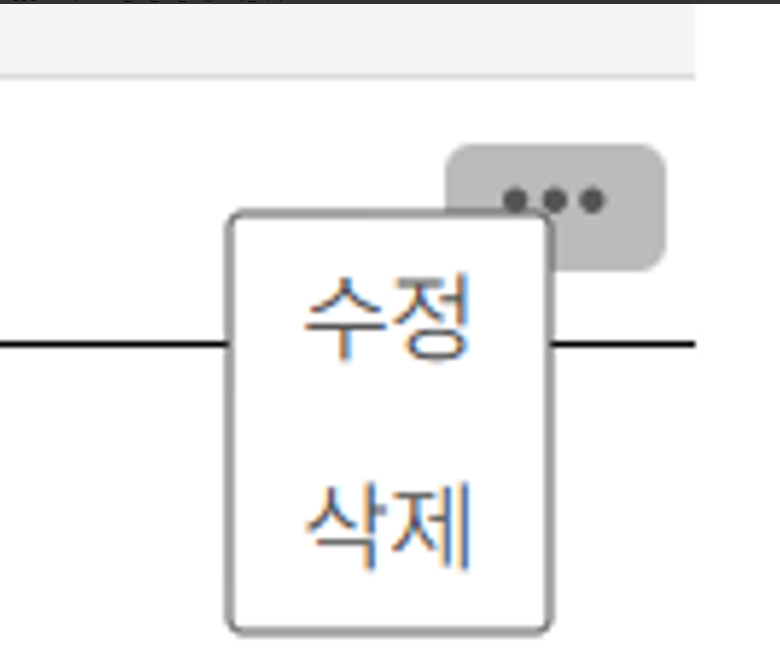
우선 Styled component를 써서 ThreeDots를 누르면 드롭다운박스가 뜨도록 UI를 구현해주었다.
Button 클릭 -> isDropdownOpenend가 true로 변경됨 -> 조건부 렌더링으로 dropdownbox 보여줌
import React, { useState } from "react";
import { ReactComponent as ThreeDots } from "assets/icon/threeDots.svg";
import { Button } from "styles/styled";
import styled from "styled-components";
import useOutsideClick from "hooks/useOutsideClick";

function ThreeDotsSelector() {
  const [isDropdownOpened, setIsDropdownOpended] = useState(false);
  const dropdownOptions = [
    { num: 1, name: "수정" },
    { num: 2, name: "삭제" },
  ];
  const handleClickOutside = () => {
    setIsDropdownOpended(false);
  };
  return (
    <div>
      <Button
        width="2.5rem"
        padding="0rem 0rem 0rem 0rem"
        height="1.5rem"
        onClick={(event) => {
          setIsDropdownOpended(true);
        }}
      >
        <ThreeDots style={{ width: "14px", height: "14px" }} />
      </Button>
      {isDropdownOpened && (
        <DropdownBox>
          {dropdownOptions.map((option) => (
            <Option key={option.num}>{option.name}</Option>
          ))}
        </DropdownBox>
      )}
    </div>
  );
}
const DropdownBox = styled.div`
  position: absolute;
  background-color: var(--white);
  border-radius: 0.2rem 0.2rem 0.2rem 0.2rem;
  border: solid 0.08rem #555;
  transform: translate(-2.5rem, -0.7rem);
  z-index: 50;
`;
const Option = styled.div`
  background-color: "var(--white)";
  padding: 0.6rem 0.8rem 0.6rem 0.8rem;
  font-size: 1.15rem;
  &:hover {
    background-color: var(--gray-hover);
    cursor: pointer;
  }
`;
export default ThreeDotsSelector;
자 그럼 남은건 해당 컴포넌트의 바깥요소를 클릭했을 때 드롭다운이 닫힐 수 있도록 구현해야 한다.
[외부영역 클릭감지]
우선 외부영역을 감지해줄 hook을 작성해주자.
import React from "react";

const useOutsideClick = (callback) => {
  const ref = React.useRef();
  React.useEffect(() => {
    const handleClick = (event) => {
      if (ref.current && !ref.current.contains(event.target)) {
        console.log("Clicked outside");
        callback();
      }
    };

    document.addEventListener("click", handleClick);
    return () => {
      document.removeEventListener("click", handleClick);
    };
  }, [ref]);
  return ref;
};

export default useOutsideClick;
이 훅은 반환한 ref값을 드롭박스에 넣어 사용한다.
document 전체에 클릭이벤트를 감지하도록 리스너를 등록해준 후, 클릭이 발생하면 전달 받은 callback 함수를 실행한다.
클릭이 발생했을 때 분기문을 걸어 다음 조건을 걸어준다.
1. 참조하고 있는 ref값이 있을 것.
2. 이벤트가 발생한 곳이 ref값이 참조하는 요소의 자식요소가 아닐 것.
따라서 callback에는 외부요소를 클릭했을 때 발생시킬 함수를 전달해주면된다.
이를 토대로 위 드롭박스 코드를 수정하면 다음과 같다.
import React, { useState } from "react";
import { ReactComponent as ThreeDots } from "assets/icon/threeDots.svg";
import { Button } from "styles/styled";
import styled from "styled-components";
import useOutsideClick from "hooks/useOutsideClick";

function ThreeDotsSelector() {
  const [isDropdownOpened, setIsDropdownOpended] = useState(false);
  const dropdownOptions = [
    { num: 1, name: "수정" },
    { num: 2, name: "삭제" },
  ];
  const handleClickOutside = () => {
    setIsDropdownOpended(false);
  };
  const ref = useOutsideClick(handleClickOutside);
  return (
    <div>
      <Button
        width="2.5rem"
        padding="0rem 0rem 0rem 0rem"
        height="1.5rem"
        onClick={(event) => {
          event.stopPropagation(); //이게 없으면 document까지 버블링됨
          setIsDropdownOpended(true);
        }}
      >
        <ThreeDots style={{ width: "14px", height: "14px" }} />
      </Button>
      {isDropdownOpened && (
        <DropdownBox ref={ref}>
          {dropdownOptions.map((option) => (
            <Option key={option.num}>{option.name}</Option>
          ))}
        </DropdownBox>
      )}
    </div>
  );
}
const DropdownBox = styled.div`
  position: absolute;
  background-color: var(--white);
  border-radius: 0.2rem 0.2rem 0.2rem 0.2rem;
  border: solid 0.08rem #555;
  transform: translate(-2.5rem, -0.7rem);
  z-index: 50;
`;
const Option = styled.div`
  background-color: "var(--white)";
  padding: 0.6rem 0.8rem 0.6rem 0.8rem;
  font-size: 1.15rem;
  &:hover {
    background-color: var(--gray-hover);
    cursor: pointer;
  }
`;
export default ThreeDotsSelector;
처음에는 버튼 클릭 시, stopPropagation()을 주지 않았었는데 이는 버튼을 눌러도 드롭박스가 뜨지 않게 만들었다.
동작을 뜯어보면
stopPropagation을 쓰지 않았을 경우,
1. 처음 렌더시 isDropdownOpened는 false상태이다
2. 버튼 클릭 -> isDropdownOpened가 true가 되면서 조건부 렌더링이 된다
3. DropdownBox에 ref 할당 -> ref가 할당되면서 useOutsideClick 훅 할당
4. document에 이벤트리스너 등록됨 -> 버튼에서 발생했던 이벤트가 버블링이 일어나 document에서 이벤트가 일어남
5. 분기문 검사시 event.target (currentTarget과 헷갈리지말자) 즉 버튼요소는 dropdownbox의 자식 요소가 아니다
6. 콜백함수 실행 -> isDropdownOpened false로 변경
이러한 프로세스로 인해 버튼 클릭시 드롭다운이 열리지 않는 것 처럼 보인다.
따라서 버튼클릭 이벤트 후 stopPropagation()을 써서 이벤트가 document로 버블링되는 것을 막아주어야 한다.
이벤트 버블링에 대한 개념을 알곤 있었지만 stopPropagation을 쓸만한 일이 딱히 없어 실전에 적용해 볼 일은 없었다.
이번 드롭박스 구현을 통해 버블링에 대한 개념을 확립할 수 있었다!
참고
https://www.robinwieruch.de/react-event-bubbling-capturing/
https://www.robinwieruch.de/react-hook-detect-click-outside-component/